Knifemaking - Generic
Leather Sheaths
A basic explanation on how to make leather sheaths for different
objects.
Sheaths Details:
-For a digital camera.
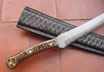
-For a small sword (decorated)
Sheath making process
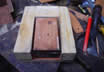
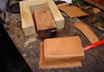
If I can't press the actual item or I know I'm going to make several
sheaths for the same kind of item (lighters for example), I make a
mold out of wood. In this case I make the outer parts fixed, but you
can have that adjustable and just make the inner part. (Picture
1)
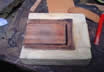
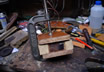
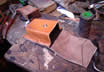
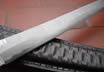
After you have the proper mold, you have to wet the leather with water
or alcohol, so it can take the exact desired shape, place it on the
mold and then press it till it dries. (Pictures 2 and 3)
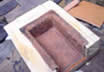
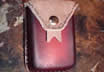
Once it's dry, you can take it out of the mold and just sew he other
half of it. (Pictures 5 and 6)
You can add the desired method of closing and choose a color to dye
it and later polish it.
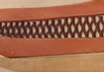
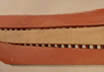
You can also add materials on the mold to add textures on the leather.
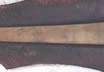
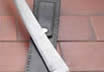
To make a sheath for a knife, I make an exact copy of the knife in
wood, as I don't want to scratch the blade. Then I make a female version
of it and cut some window shielding steel plates to place there and
mark the designs into the leather. After I have that I glue the metal
to the inferior layer of wood and place the knife mock up into place
to confirm the fit. (Pictures 7 and 8)
Picture 1
Picture 2
Picture 3
Picture 4
Picture 5
Picture 6
Picture 7
Picture 8
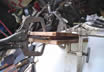
After that, I place the wet leather sheet between the
knife mock up and the windows shielding plate. (Picture 9)
Next step is to make a nice sandwich with that and press it until
the leather dries. (Picture 10)
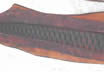
Once it dries up, you get are ready to cut this half of the sheath
to sew it into the other one. (Picture 11)