|
Tutorials - Making Damascus
Steel
A basic introduction on how different kinds of damascus steel are
made. |
 |
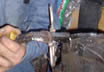
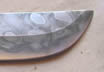
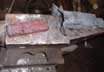
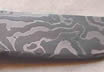
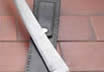
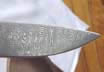
In order to make damascus I have four basic processes,
the "traditional" one, in which I tie the different pieces
of steel and take them to about 1300C and start hammering til they
weld together (I use Sodium borate as flux). Then I start modeling
and the steel to the shape of the knife I want to make. (Picture
1)
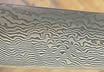
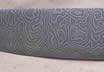
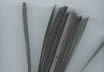
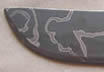
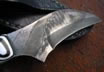
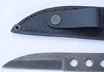
Depending on the kind of damascus I want to make, I fold the steels
"n" times (Picture 2)
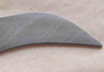
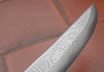
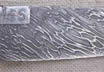
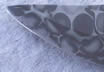
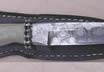
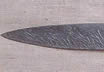
I can also rotate the layers along the horizontal axis, etc. (Picture
3)
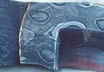
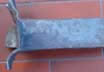
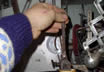
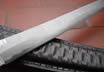
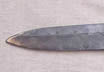
The second one is to grab a distribution chain from a car or bike
and start working with that, as it's made from different steels, I
can get nice patterns with that too.
Sometimes I use this as a new layer for a another damascus and I get
very strange and cool patterns. (Pictures 4 and 5)
The third process is the San Mai, that allows me to get a super hard
edge, an elastic body/spine and all the aestethics of the damascus
steels. (Pictures 6 and 7)
To do this, I place the layers of steel on a rectified piece of pipe
to contain them, placing two layers of stainless steel at the bottom
and the top to prevent the carbon steels to weld against the pipe.
(Pictures 8, 9, 10 and 11) |
|
| Picture 1 |
|
Picture 2 |
|
Picture 3 |
|
Picture 4 |
|
Picture 5 |
|
Picture 6 |
|
Picture 7 |
|
Picture 8 |
Once I got them at the proper temperature, I remove
them from there, start hammering it til they weld properly and then
work it like on the first process.
And I also make cable damascus. (Picture 12)
On either of this four variations, once the forged shape is finished,
I let the steel cold, use the belt to shape it into the final stage,
then polish it, temper it, re temper it at a lower temperature, clean
it from the oil tempering residues, and finally etch it on the acid.
(Picture 13)
In the case of the "Sandwiches Damascus", I etch the blade
a couple of times during the grinding process to make sure the layers
are symetrical on both sides of the knife.
Once you have the knowledge, you can start practising with new materials,
like nickel. (Pictures 14 and 15)
Of course you can also combine this methods and come up with something
a little more elaborated. (Picture 16) |
| Picture 9 |
|
Picture 10 |
|
Picture 11 |
|
Picture 12 |
|
Picture 13 |
|
Picture 14 |
|
Picture 15 |
|
Picture 16 |
|