|
Tutorials - Making Cable
Damascus
Traditional way to transform steel cable into knives. |
 |
I usually use and recommend 1 1/4" (or at least
3/4) cable, but we were on a on a friend's workshop and we only had
1/2". To make it worse, it had a rope inside, so it had to be
removed and replaced by a small steel rod.
That said, this is the exact same process I use to forge cable.
First of all, I put the cable on the oven to get it hot. (Pictures
1 and 2)
Once they're red hot, I place it on a vise and rotate the cable with
some pliers on the same direction as the strains to tighten it and
remove the big spaces. (Picture 3)
After that, I put some borax to act as flux and put it back into the
oven. (Picture 4)
I leave it a while there until the flux melts and retrieve it to start
hammering the cable to get it even tighter. (Picture 5)
After the hammering, I remove the black residues with a steel brush.
(Picture 6)
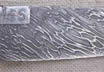
I repeat this process until the rounded and somewhat loose cable looks
like a square section tight barstock. (Picture 7)
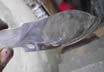
Once I reach that point, I place it on the vise again and bend the
cable to gain more volume, and then take it back to the anvil and
start hammering it again. (Picture 8) |
|
| Picture 1 |
|
Picture 2 |
|
Picture 3 |
|
Picture 4 |
|
Picture 5 |
|
Picture 6 |
|
Picture 7 |
|
Picture 8 |
After that, I keep on hammering the bended cable to
make it weld well, not only between the strains of the cable, but
on both sides of the bended piece. (Pictures 9 and 10)
I have to repeat all the previous steps several times to accomplish
this.
Here's how it looks hot and cold when it's still hammering to do.
(Pictures 11 and 12)
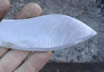
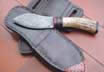
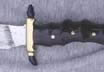
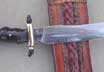
If you keep working, the cable will look just like any other steel,
you can work it as any other steel, and you won't realize it's cable
until you actually etch it on acid. (Picture 13)
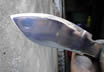
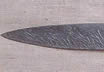
A sign of a properly welded cable is that it will show no imperfections
when mirror polished. (Pictures 14 and 15)
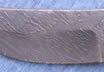
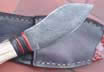
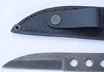
Sometimes, I leave parts of the cable without a perfect welding for
visual effects that won't compromise the performance of the blade.
(Picture 16) |
| Picture 9 |
|
Picture 10 |
|
Picture 11 |
|
Picture 12 |
|
Picture 13 |
|
Picture 14 |
|
Picture 15 |
|
Picture 16 |
|